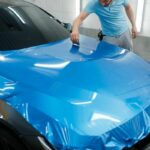
Is your car’s interior looking worn and tired out? A car’s upholstery experiences a lot of friction every day.
Children, pets, wallets, phones, keys, and your own posterior can wear down your car’s upholstery. You can keep the outside of your car clean and sparkling, but a shabby interior will always stand out.
If you have a newer car, you’ll usually be able to purchase replacement seat covers from the manufacturer.
You can upholster these cars yourself, but compared to older cars, their form can be a lot more difficult to deal with.
Older cars that don’t have an intricate build tend to be easier to reupholster. If you can’t find replacement seat covers, or you just want to try to process yourself, you’ll learn how to upholster a car seat below.
If you’re ready to give your car’s interior a fresh new look, keep reading!
How To Upholster A Car Seat
Reupholstering a car seat can take anywhere from 2-4 hours. You don’t need to be a professional to do this, but an intermediate amount of skill is required.
Safety Guidelines
Car work isn’t just tiresome, it can be dangerous. Here are the safety gear items you’ll need before you start.
- Nitrile gloves to protect against chemicals within the material
- Long-sleeved shirts or overalls to protect your skin
- Safety glasses
- A ventilator is optional, but as long as you are working in a well-ventilated place, you should be fine.
Make sure you have all of these items before you start, as this can save you valuable time while you are working on your car.
Other than safety gear, you’ll need a flat, even surface to work on. This may be your garage floor, driveway, or on your street.
If you do choose to work on your street, check with your local regulations to ensure you aren’t breaking any rules beforehand.
Items You Will Need
Here is a list of items you’ll need to reupholster your car seat.
Tools
- Marker
- Staple hook
- Seam ripper or scissors
- Sewing machine
- Screwdriver
- Socket wrench set
- Pry instrument
Things You Will Need
- Replacement seat covers
- Replacement seat fabric
- Thread to match car upholstery
- Large white paper sheet to make a guide
Reupholstering A Car Seat With Replacement Seat Covers

The following method will outline how to replace your car seats with replacement seat covers.
- Gather your items, including your replacement seat covers.
- Remove the car seat’s base with the suitable socket wrench.
- Check if any electrical parts are linked to the seat, like power-seat buttons. If they are, disconnect the components.
- Take the seat off, then set it down in your work area.
- Take the headrest off by pushing the small trigger at the bottom of the seat.
- Unzip the upholstery from the back of the seat. This will expose the seat’s base.
- Without removing the seat base from the frame, unscrew the base.
- Remove the side clips that link the cushion and the seat’s base.
- Using an upward motion, take off the upholstery as you remove the clips on the inside. Use the pry instrument to do this.
- Repeat steps 7 and 8 to remove the seat’s back upholstery.
- Apply the new seat base upholstery onto the base cushion. Stretch the fabric over to attach it to the first clip at the back.
- Fix the clips to the cushion from the back to the front. Make sure the fabric keeps taut for the whole process.
- Fix the seat base and frame together again.
- Do steps 10 and 11 again for the seat’s backing.
- After the upholstery for the seat’s backing is fastened securely, zip the backing up.
- Fix the headrest back on, then fix the seatback to the car.
- You’re done!
How To Reupholster A Car Seat From Scratch
- Gather your items, including the fabric you wish to upholster the seat with.
- Remove the seat’s base from the floor using the correct socket wrench.
- Look out for any electrical parts connected to the seats, then remove these connectors.
- Take the seat off and place it on your workstation.
- Press the button at the base to take the headrest off.
- Unzip the current upholstery off of the seat backing so you can see the seat’s base.
- Without removing the seat base, unscrew it from its frame.
- Unfasten the side clips that fix the cushion and seat base together.
- In an upward motion, take the upholstery off as you remove the extra clips on the inside. Use your pry tool to do this.
- Do steps 7 and 8 again for the seat’s backing.
- Place the upholstery in front of you as it’s still intact. Use your marker to mark where the seams touch, including where the mountain clips are located. You’ll need these marks when you begin sewing and remounting your new upholstery.
- Use your scissors to remove the upholstery parts from each other.
- Place the unstitched upholstery on a big sheet of paper, then trace around it to make a pattern guide. Don’t forget to mark any openings, like the headrest slots on the paper.
- Cut the pattern out of the paper, then lie it upon the fabric.
- Use your pattern as a guide to cut the upholstery out, leaving ¾ of an inch seam allowance.
- Sew the cut pieces of fabric together, using the seam markers to help you.
- Sew in any desired zips or mounting clips.
- Apply the new seat base upholstery onto the base cushion. Move it across to fix with the first clip at the back.
- Fix the clips to the cushion from the back to the front. Make sure that the fabric keeps taught as you do this.
- Fix the seat frame and seat base to each other.
- Do steps 18 and 19 again to apply the seat backing.
- After the seat backing has been fastened, zip the backing up.
- Fix the headrest back again, then do the same with the seat.
- You’re finished!
Conclusion
Now you know how to upholster your car seats! Both methods above will help you whether you want to replace your seat covers or reupholster from scratch. Here are a few tips to help you with the process.
Don’t glue foam and leather together. Leather needs to stretch, but glue can make it pucker and crease.
Older fabric can be brittle, which makes it harder to take off of the seat. If you need to make a template, do this while the upholstery is still fastened to the seat cushion. This will give you precise dimensions.